Adding a photo gallery to Jekyll Chirpy
How I added a full photo gallery system to my Jekyll Chirpy site. S3 and CloudFront for image hosting, custom layouts for album pages, and Fancybox for lightbox viewing. Built for travel photography and designed so anyone with a Chirpy site can replicate it.
Why I Built This
I have been shooting since picking up the Sony A6700. The first trip was Bodrum last year. This time Montenegro. A full week carrying the camera everywhere, shooting with intent. I came back with hundreds of photos, edited them down in Lightroom, and then had no good place to put them.
I thought about posting them on TikTok or Instagram, however I do not have social media and I am not a fan of it. So the photos sat on my drive. Then I realised I wanted a dedicated section on my website. What originally started as writing a trip journal evolved into building a full gallery system, and I am glad it did. This format is better for what I want. Full-resolution images, not verticals compressed for a feed. I control the data, I control the presentation, and as a cloud engineer that matters to me. Completing this solution felt natural.
There is a practical side too. When I photograph people, they usually ask if I have social media. Now I respond with my website. They can view the portfolio there. Chirpy is mobile responsive so it works on a phone the same way it works on a desktop. No app needed, no account needed, just a link.
My blog here runs on Jekyll with the Chirpy theme. I already wrote a detailed trip journal with a few inline images, but Chirpy only lets you add one image at a time.

I wanted to show more of what I shot without turning the post into a 50-image scroll. And I wanted a dedicated gallery section where people could browse all the photos from a trip in one place.
I looked at open source photography sites and gallery platforms. Nothing felt right. They were either too bloated, too opinionated about design, or required moving away from the tools I already know and like. I like Chirpy. I like Jekyll. I like the dark theme, the sidebar, the way posts are structured. So instead of switching to something else, I built a gallery system directly into Chirpy.
The other thing that made this interesting is that it sits at the intersection of two things I care about. Photography is something I am developing as a skill. AWS infrastructure is something I already know well. This project connected both. The photos come from the A6700, the hosting runs on S3 and CloudFront, the site is Jekyll on GitHub Pages, and the gallery is custom layouts and Liquid templates integrated into the Chirpy theme. Everything I built here I can reference again when setting up future sites.
What I Built
The gallery system has three parts.
A gallery tab in the sidebar
Chirpy’s sidebar has Home, Categories, Tags, Archives, and About. I added a Gallery. tab. Click it and you land on a gallery index page showing album cards for each trip. Each card has a cover photo with the trip name overlaid.
Album pages
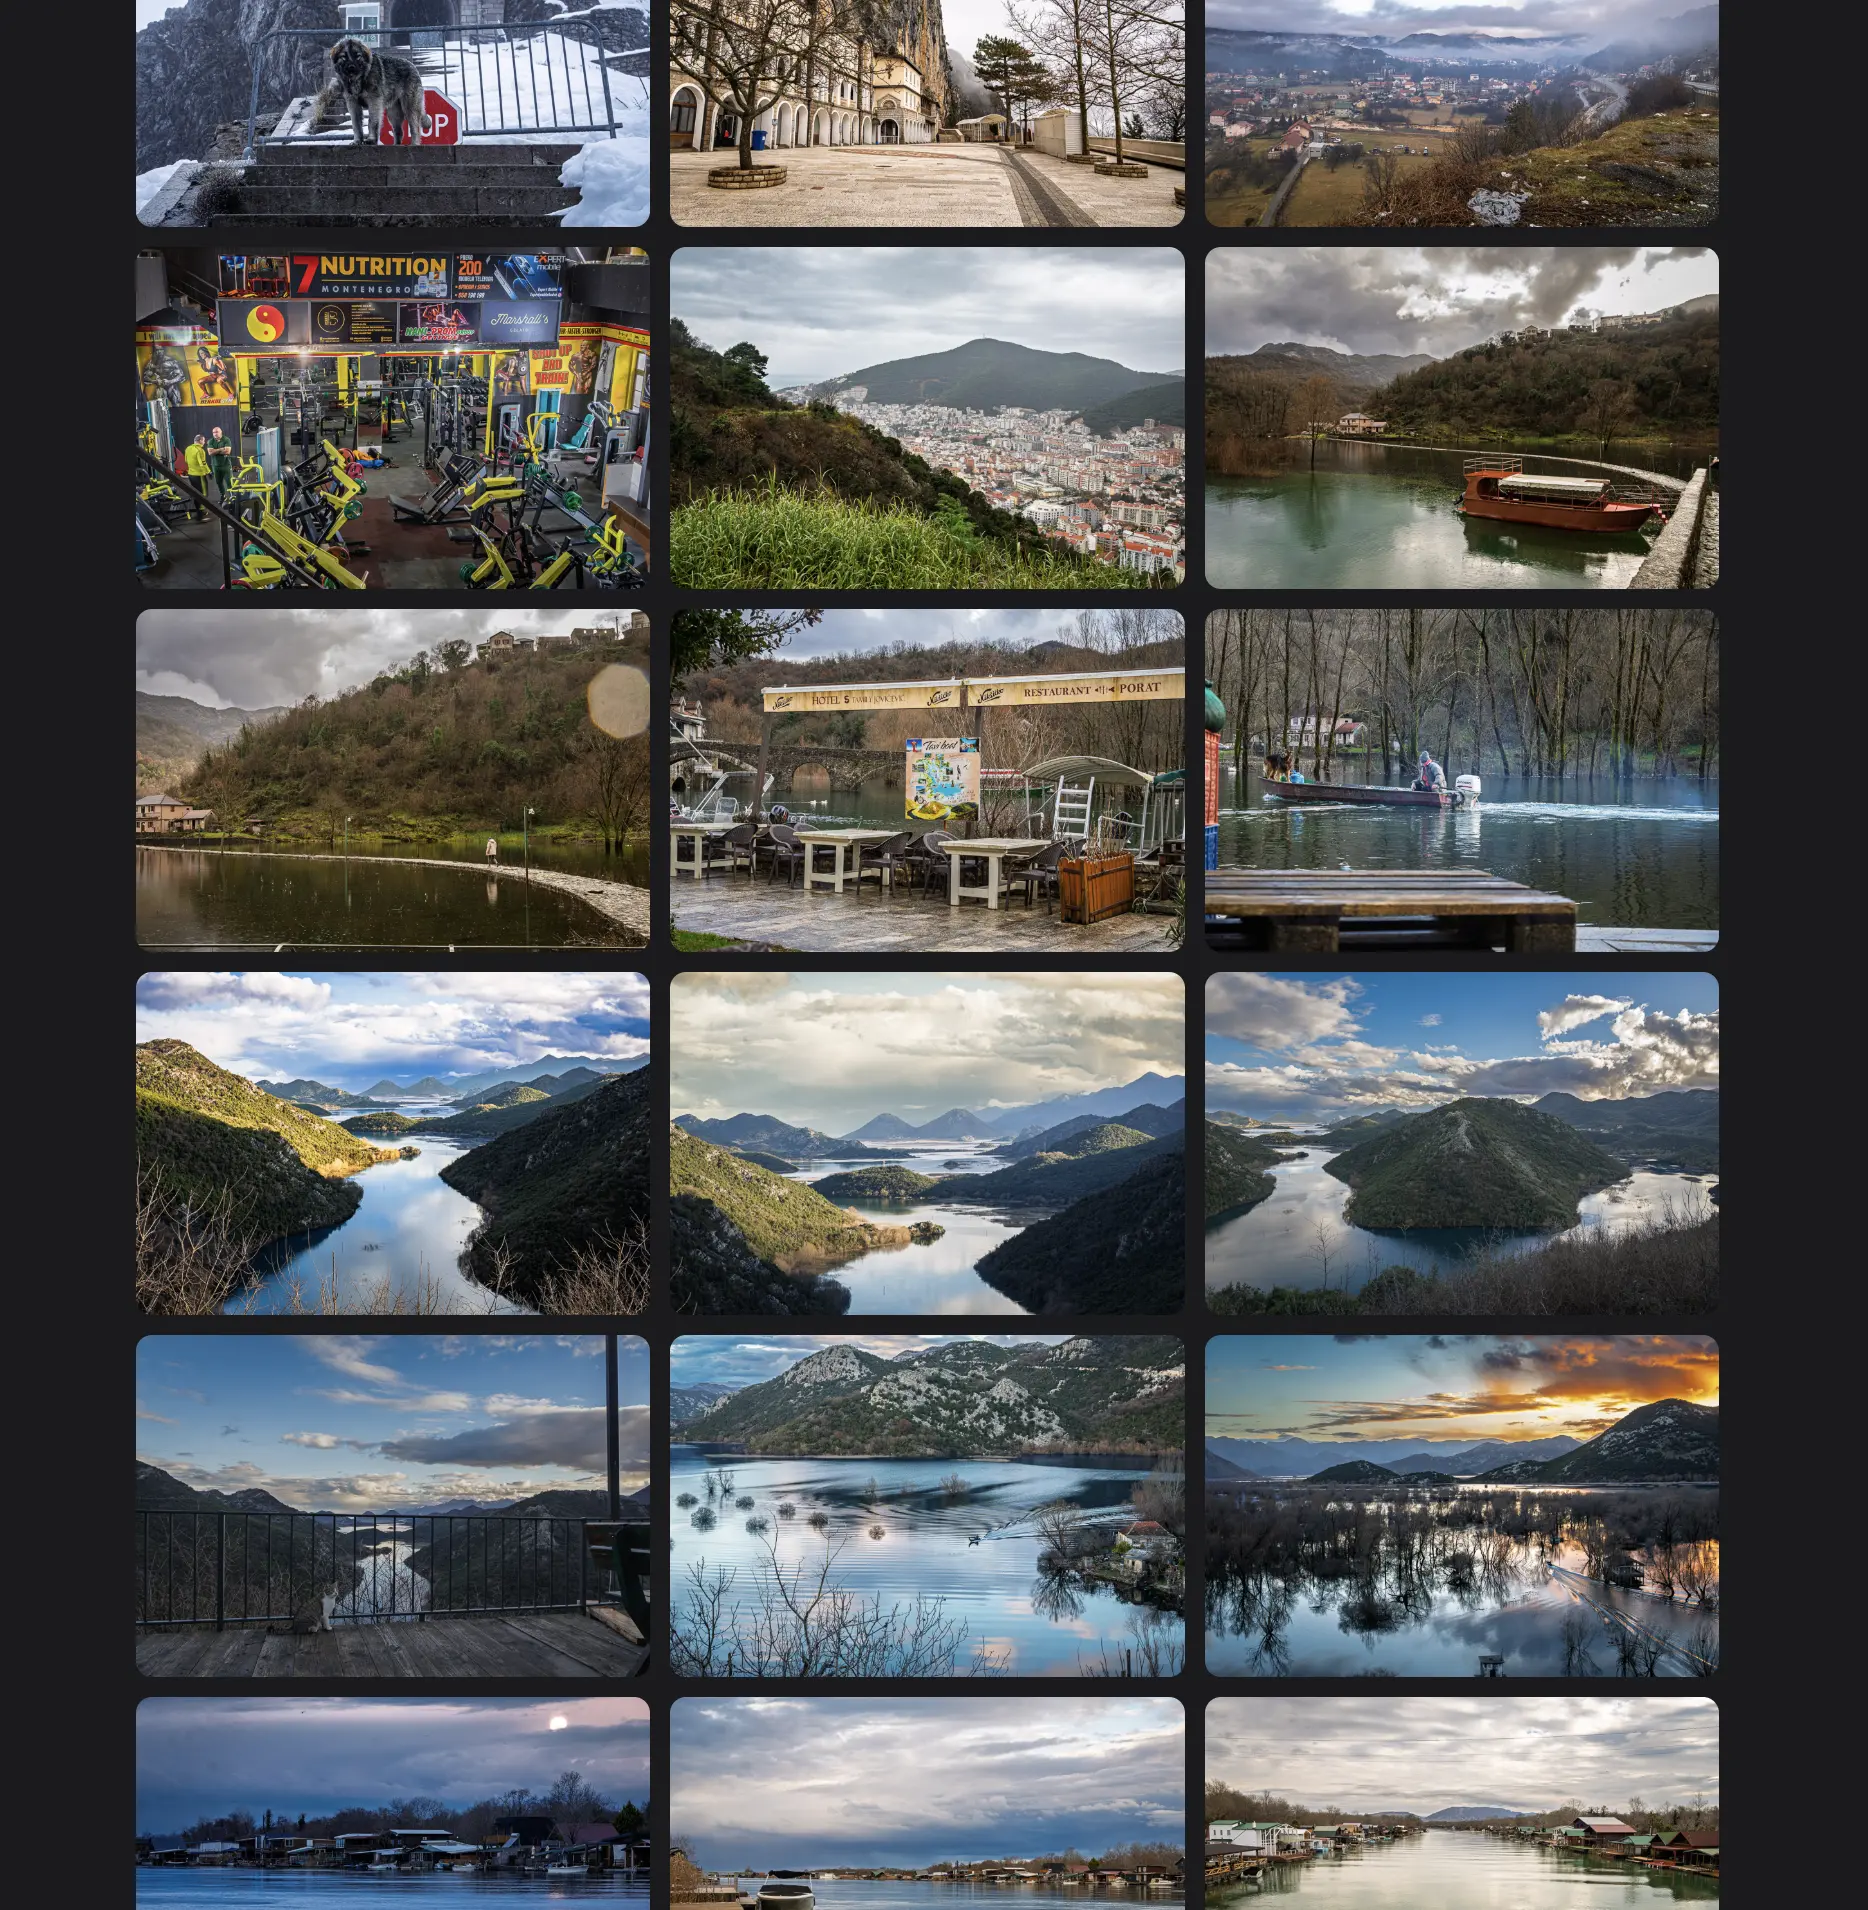
Click into an album and you get a full grid of photos with a lightbox viewer. The grid loads thumbnails for speed. Click any photo and a Fancybox lightbox opens showing the full-resolution image with swipe navigation. The URL stays on your site the entire time. No redirects, no downloads. See the Montenegro gallery.
Inline post galleries
Inside any blog post, I can embed a photo grid with a single Liquid include. The photos appear between sections of writing, with the same lightbox behaviour. This means a trip journal can have the full story alongside curated selections of photos, and the reader can click through to the full album if they want to see everything.
Architecture
The photos do not live in the GitHub repo. A week of A6700 photos would easily be hundreds of megabytes, and GitHub Pages has a soft repo size limit around 1GB. Instead, the photos are hosted on S3 with CloudFront in front for caching and delivery.
1
2
3
4
5
6
7
8
9
notes.digitalden.cloud (GitHub Pages)
├── /gallery/                          ← album index
├── /gallery/montenegro-january-2026/  ← album page with grid + lightbox
├── /posts/montenegro-january-2026/    ← blog post with inline gallery

S3 bucket (via photos.digitalden.cloud)
├── gallery/montenegro-2026/
│   ├── full/    ← full-resolution images for lightbox
│   └── thumbs/  ← 800px thumbnails for the grid
When someone visits the gallery or a blog post, the page loads from GitHub Pages as normal. The img tags fetch thumbnails from CloudFront. When someone clicks a photo, the lightbox loads the full-resolution version from the same CDN. The visitor never leaves the site and never sees the CloudFront URL.
I set up a custom domain photos.digitalden.cloud pointing to the CloudFront distribution. This keeps the image URLs clean and means I can change the underlying infrastructure without updating any code in the site.
S3 and CloudFront Setup
S3 Bucket
I created a bucket called digitaldencloud-gallery in eu-west-2. The bucket is private. No public access.
CloudFront Distribution
I created a CloudFront distribution with Origin Access Control (OAC) so only CloudFront can read from the bucket. CloudFront automatically updated the bucket policy to restrict access to the distribution.
The bucket policy looks like this:
1
2
3
4
5
6
7
8
9
10
11
12
13
14
15
16
17
18
19
{
  "Version": "2008-10-17",
  "Statement": [
    {
      "Sid": "AllowCloudFrontServicePrincipal",
      "Effect": "Allow",
      "Principal": {
        "Service": "cloudfront.amazonaws.com"
      },
      "Action": "s3:GetObject",
      "Resource": "arn:aws:s3:::digitaldencloud-gallery/*",
      "Condition": {
        "ArnLike": {
          "AWS:SourceArn": "arn:aws:cloudfront::ACCOUNT_ID:distribution/DISTRIBUTION_ID"
        }
      }
    }
  ]
}
Custom Domain
I added photos.digitalden.cloud as an alternate domain on the distribution. Since digitalden.cloud is managed in Route 53 and I already have a wildcard TLS certificate (*.digitalden.cloud) in ACM, CloudFront picked it up automatically. I then created an A record alias in Route 53 pointing photos.digitalden.cloud to the CloudFront distribution.
After a few minutes of DNS propagation, the images were accessible at:
1
https://photos.digitalden.cloud/gallery/montenegro-2026/full/montengro-gallery-25.jpg
Note
The S3 bucket is private. Accessing the S3 URL directly will return access denied. The images are only accessible through CloudFront, which is how the site loads them. Visitors never interact with the S3 URL directly.
Repo Structure
These are the files I added to the existing Chirpy repo. Nothing touches the existing posts, layouts, or config beyond two small additions to _config.yml.
1
2
3
4
5
_tabs/gallery.md                    ← sidebar tab
_layouts/gallery.html               ← gallery index layout
_layouts/gallery-album.html         ← album detail layout
_includes/post-gallery.html         ← inline gallery for posts
_gallery/montenegro-january-2026.md ← album data
Config Changes
Two additions to _config.yml.
First, register the gallery collection alongside the existing tabs collection:
1
2
3
4
5
6
7
collections:
  tabs:
    output: true
    sort_by: order
  gallery:
    output: true
    sort_by: date
Second, add defaults for gallery items so every album file uses the right layout and permalink pattern:
1
2
3
4
5
6
7
8
9
defaults:
  # existing defaults...

  - scope:
      path: ""
      type: gallery
    values:
      layout: gallery-album
      permalink: /gallery/:title/
That is all for config. Everything else is new files.
The Gallery Tab
_tabs/gallery.md adds the tab to Chirpy’s sidebar. The order: 4 places it before About.
1
2
3
4
5
6
---
layout: gallery
icon: fas fa-camera
order: 5
title: Gallery
---
The Gallery Index Layout
_layouts/gallery.html extends Chirpy’s page layout. It loops through all items in the site.gallery collection and renders each as a card with a cover image and overlay text.
The cards use CSS grid with auto-fill so they reflow responsively. Each card links to the album’s detail page. The cover image loads from the album’s cdn_base path on CloudFront.
1
2
3
4
5
6
7
8
9
10
11
12
<div class="gallery-albums">
  {% assign albums = site.gallery | reverse %}
  {% for album in albums %}
    <a href="{{ album.url }}" class="album-card">
      <img src="{{ album.cdn_base }}/full/{{ album.cover }}" alt="{{ album.title }}">
      <div class="album-overlay">
        <h3>{{ album.title }}</h3>
        <p>{{ album.description | default: album.date_range }}</p>
      </div>
    </a>
  {% endfor %}
</div>
The cards have a hover effect that lifts them slightly and scales the image. The overlay uses a gradient from transparent to dark so the text is always readable regardless of the cover photo.
Customising the design
All gallery styling lives in<style>tags at the top of two files:_layouts/gallery.htmlfor the album cards on the index page, and_layouts/gallery-album.htmlfor the photo grid on album pages. Change it there and it updates across the whole gallery.
The Album Detail Layout
_layouts/gallery-album.html renders a single album. It shows a header with the description, date range, camera, photo count, and a link back to the blog post. Below that is a grid of all photos.
I went with CSS grid (repeat(3, 1fr)) rather than CSS columns (masonry). Grid fills left to right in even rows. Masonry fills top to bottom in columns, which can leave uneven ends. Since all my Sony photos are landscape and the same aspect ratio, grid gives cleaner results. The layout file includes commented-out masonry CSS so I can switch between the two by commenting and uncommenting.
Each photo is a div with data-full and data-caption attributes. The img tag loads the thumbnail from /thumbs/. Clicking the div triggers a Fancybox lightbox that loads the full-resolution image from /full/.
Why Fancybox Over Other Lightboxes
A lightbox is the full-screen overlay that opens when you click a photo — darkened background, the image front and centre, arrows to navigate through a set. Fancybox is the JavaScript library that powers this in the gallery.
I initially tried GLightbox. It worked but had issues with Chirpy. Chirpy automatically wraps every image inside a post with its own <a class="popup img-link"> tag pointing to the image source. This meant clicking a gallery image triggered Chirpy’s built-in lightbox instead of GLightbox, and it loaded the thumbnail instead of the full-resolution version.
Fancybox 5 solved this. Instead of relying on <a> tags that Chirpy intercepts, I attached click event listeners directly to the div elements with e.stopPropagation() to prevent Chirpy from capturing the click. Fancybox receives an array of image objects with explicit src paths pointing to the full-resolution versions on CloudFront.
The Fancybox config is stripped down to just the essentials:
1
2
3
4
5
6
7
8
9
10
11
12
13
14
15
Fancybox.show(albumData, {
  startIndex: i,
  Toolbar: {
    display: {
      left: [],
      middle: [],
      right: ["close"],
    },
  },
  Thumbs: false,
  Slideshow: false,
  Images: {
    zoom: false,
  },
});
No thumbnail strip, no slideshow controls, no zoom. Just the image, left/right arrows, and a close button.
Enabling more features
The config hasThumbs,Slideshow, andzoomset tofalse. Change any of these totrueto enable a thumbnail strip, auto-play slideshow, or click-to-zoom. The settings are in_layouts/gallery-album.htmland_includes/post-gallery.html.
Album Data Files
Each trip gets a markdown file in _gallery/. The front matter defines everything about the album. The layout reads from this data.
1
2
3
4
5
6
7
8
9
10
11
12
13
14
15
16
17
18
19
20
21
---
layout: gallery-album
title: "Montenegro"
description: "A week in Montenegro. Mountains, coast, snow, and rain."
date: 2026-01-27
date_range: "January 2026"
camera: "Sony A6700 · 18-135mm"
photo_count: 28
blog_post: /posts/montenegro-january-2026/

cdn_base: https://photos.digitalden.cloud/gallery/montenegro-2026

cover: montenegro-gallery-11.jpg

photos:
  - file: montenegro-gallery-1.jpg
    caption: ""
  - file: montenegro-gallery-2.jpg
    caption: ""
  # ... more photos
---
The cdn_base field is the CloudFront URL for the album folder. The layout appends /full/ or /thumbs/ and the filename to construct the image URLs. Adding a new album means creating a new file in _gallery/, uploading the photos to S3, and pushing to GitHub. The gallery index picks up new albums automatically.
Inline Post Gallery
_includes/post-gallery.html lets me embed a photo grid inside any blog post. The usage is a single Liquid include:
1
2
3
4
{% include post-gallery.html
cdn="https://photos.digitalden.cloud/gallery/montenegro-2026"
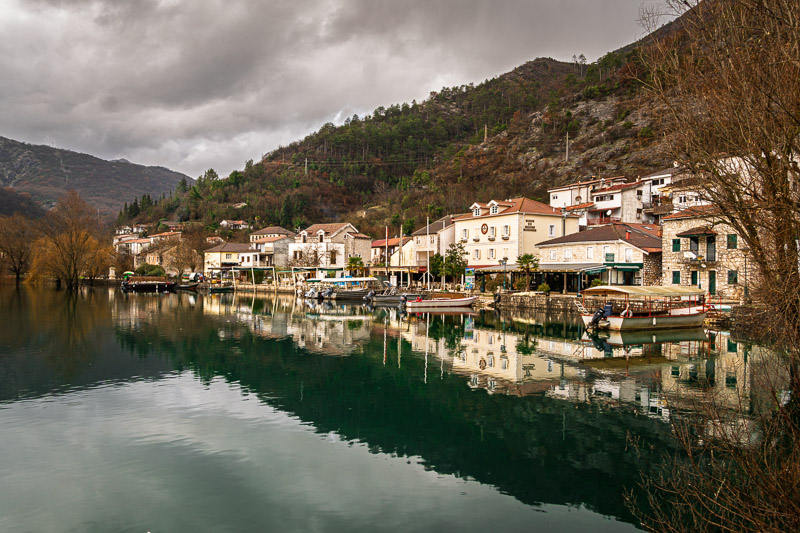
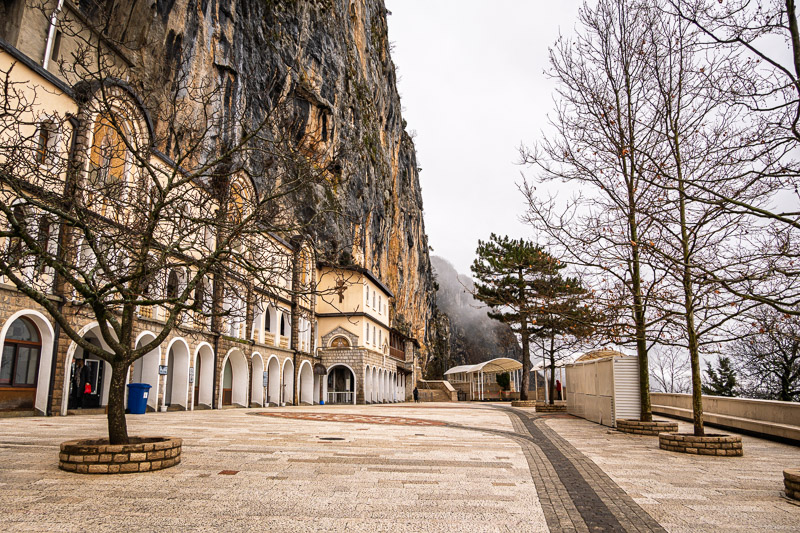
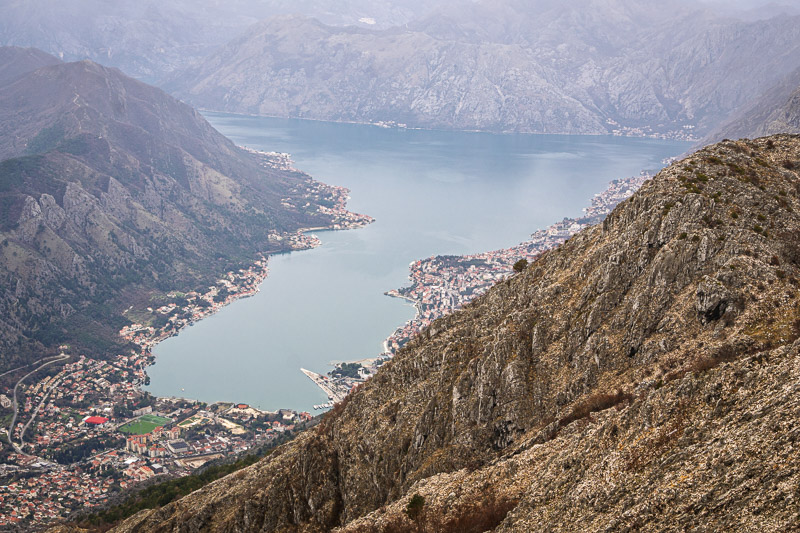
photos="montenegro-gallery-5.jpg|Kotor,montenegro-gallery-8.jpg|Lovćen,montenegro-gallery-11.jpg|Ostrog"
%}
The photos parameter is a comma-separated list of filename|caption pairs. The include splits this, renders a CSS columns grid with thumbnails, and attaches the same Fancybox lightbox behaviour. I can add as many of these throughout a post as I want, one per section, per day, however it reads best.
This is the part that really changed things. Chirpy’s default behaviour is one image at a time with its built-in lightbox. The include gives me a multi-image grid with full-resolution viewing in a single line of code.
Photo Workflow
The photo pipeline from camera to website:
- Shoot on the Sony A6700 with the 18-135mm lens
- Import RAW files into Lightroom Classic
- Cull and edit in Lightroom
- Export full-resolution JPEGs from Lightroom (long edge 3000px, 93 quality, sRGB)
- Export thumbnails from Lightroom (long edge 800px, 75 quality, sRGB)
- Upload both to S3 using the AWS CLI
- Update the album file in
_gallery/with the filenames - Commit and push
Two Lightroom exports and two sync commands:
1
2
aws s3 sync full/ s3://digitaldencloud-gallery/gallery/montenegro-2026/full/
aws s3 sync thumbs/ s3://digitaldencloud-gallery/gallery/montenegro-2026/thumbs/
CloudFront caches the images at edge locations so they load fast regardless of where the visitor is. The images are set-and-forget. Once uploaded, I do not touch them again.
Replicating This on Your Own Chirpy Site
If you run a Jekyll site with the Chirpy theme and want to add a gallery, here is what you need.
Step 1: Create the S3 Bucket and CloudFront Distribution
Create an S3 bucket for your photos. Create a CloudFront distribution with the bucket as the origin and enable Origin Access Control. Optionally add a custom domain and TLS certificate. Test by uploading a single image and accessing it via the CloudFront URL.
Step 2: Add Files to Your Repo
Create these files:
| File | Purpose |
|---|---|
_tabs/gallery.md | Adds Gallery to the sidebar |
_layouts/gallery.html | Gallery index layout with album cards |
_layouts/gallery-album.html | Album detail layout with grid and Fancybox |
_includes/post-gallery.html | Inline gallery include for blog posts |
_gallery/your-album.md | Album data file (one per album) |
The full source code for each file is available in the repo.
Step 3: Update _config.yml
Add the gallery collection:
1
2
3
4
5
6
7
collections:
  tabs:
    output: true
    sort_by: order
  gallery:
    output: true
    sort_by: date
Add the gallery defaults:
1
2
3
4
5
6
7
defaults:
  - scope:
      path: ""
      type: gallery
    values:
      layout: gallery-album
      permalink: /gallery/:title/
Step 4: Upload Photos
Export twice from Lightroom. First export at full resolution and high quality (JPEG, 93) for the full/ folder. Second export at 800px long edge and lower quality (JPEG, 75) for the thumbs/ folder. Sync both to S3:
1
2
aws s3 sync full/ s3://your-bucket/gallery/your-album-name/full/
aws s3 sync thumbs/ s3://your-bucket/gallery/your-album-name/thumbs/
Step 5: Create the Album File
Create _gallery/your-album.md with the front matter pointing to your CloudFront URL and listing the photo filenames.
Step 6: Commit and Push
The gallery tab appears, the album card shows on the index, and clicking through opens the full grid with lightbox viewing.
Adding more albums
Upload photos to a new folder on S3, create a new file in_gallery/, commit and push. The gallery index picks it up automatically. No layout or config changes needed.
What Comes Next
Automating the Pipeline
Right now the workflow is manual. Export from Lightroom twice, upload to S3, write the album file, commit and push. It works, but there are steps I can eliminate.
The first thing I want to build is a Lambda function triggered by S3 uploads that generates thumbnails automatically. I would export once from Lightroom at full resolution, upload to S3, and Lambda creates the 800px thumbnails. That removes the second export entirely. S3 event notifications, Lambda, and image processing — a clean serverless workflow.
On top of that, a CLI script that takes a folder of photos, syncs them to S3, generates the _gallery/*.md file with all the filenames, and commits to the repo. One command from terminal to published gallery.
I would also add a GitHub Action that invalidates the CloudFront cache when a new album file is pushed. Right now new images depend on the cache TTL expiring. An automatic invalidation on deploy means the gallery updates immediately.
Adding AI
This is where it gets interesting. The manual part of creating an album is not the upload — it is the metadata. Filenames, captions, descriptions. Every photo currently has an empty caption field because filling in 28 captions by hand is tedious.
Amazon Rekognition can analyse each image as it lands in S3. A Lambda function calls Rekognition to detect what is in the photo — mountains, water, buildings, people, food — and those labels become the starting point for captions. From there, Amazon Bedrock can take the Rekognition labels and the album metadata and generate captions written in a natural tone. I already built a Bedrock agent so this is familiar territory.
Bedrock could also help with curation. Upload 200 photos from a trip and have a model help select the best 30 based on composition, variety, and subject coverage. That would cut down the Lightroom culling step.
The end state would be: photos arrive in S3, Lambda triggers, thumbnails are generated, Rekognition analyses the images, Bedrock writes the captions, and the album file is generated with everything filled in. I go from uploading photos to a published gallery with close to zero manual metadata work.
Video Integration
I also shoot video on the A6700. The next step is embedding videos alongside photos in the same albums. Fancybox supports video natively, and hosting on YouTube means free bandwidth with the added benefit of discoverability. Listed videos get views on YouTube while the same content sits in the gallery on my site. Two audiences from one upload.
A Dedicated Photography Site
The gallery on notes.digitalden.cloud serves its purpose. Travel photos tied to trip journals, browsable from the sidebar. But I am considering a standalone photography site on its own domain, built with the same Chirpy and gallery system but focused purely on the portfolio. No blog posts, no personal stories. Just the work. That would be for people who want to see the photography on its own terms, separate from everything else.
The system I built here would transfer directly. Same layouts, same S3 pipeline, same Fancybox viewer. Different site, different audience, same foundation.
For now, the gallery lives at notes.digitalden.cloud/gallery/.
Documented February 2026.